Connecting to an AV Receiver
While HT5006 CAN be used with most AV Receiver, please DO NOT PLUG THE HT5006 INTO ANY OF THE RED / WHITE PORTS ON THE BACK OF A RECEIVER! This may permanently damage the product.
Step 1: Connect the Transmitter to a power source using the Micro-USB cable we provided, and flip the power switch to "TX" position.


Step 2: Connect your Headphones to the Transmitter.
Turn the headphones on by Pressing & Holding the Power Button (the middle button,) and keep it close to the transmitter.
Give them a few seconds, they should auto-connect. You'll see the "A" indicator on the transmitter light up, and the LED indicator on the headphone will turn SOLID BLUE.

Step 3: Connecting to AV Receiver
There are 2 ways to connect the HT5006 to your AV Receiver: DIGITAL OPTICAL OUT, or PHONES.
- Option A - DIGITAL OPTICAL
- Take the Optical Cable that we provided in the box, and plug one end of it into the "Digital Audio Out" or "Optical Out" port on the back of your AV Receiver.
-
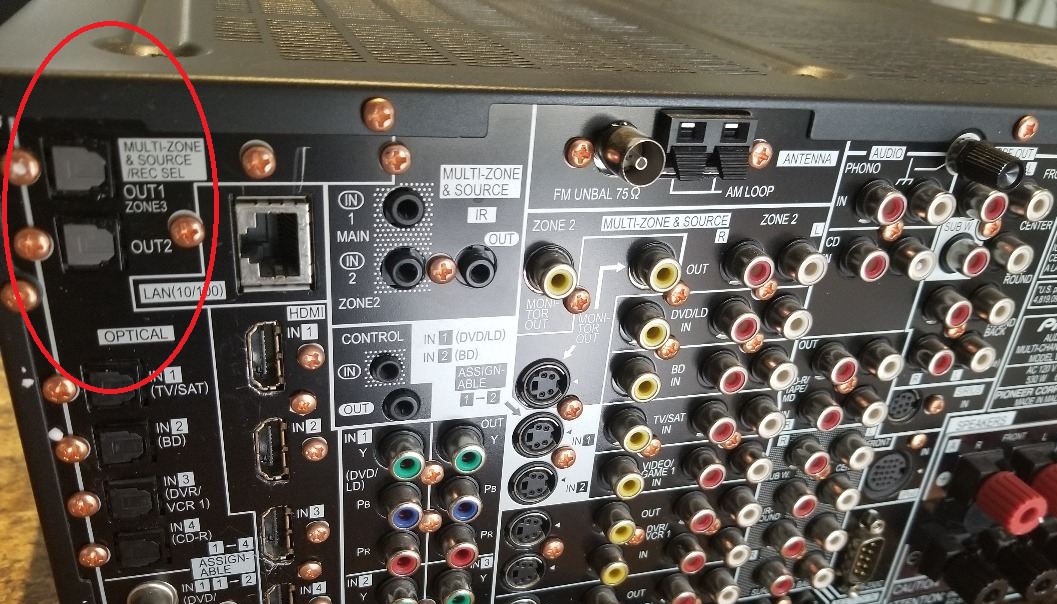
- Plug the other end of the cable into the BLACK Optical Port on the back of your transmitter.
-

- Make sure that the "OPT" indicator on the transmitter is now SOLID WHITE. If not, press the "AUX/OPT" button once.
-

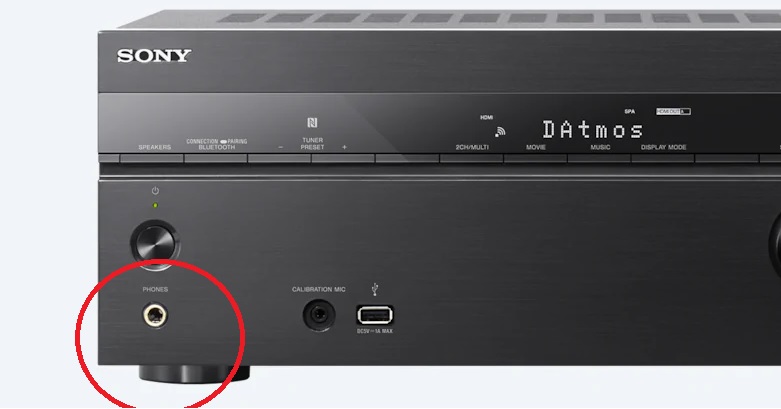
- Option B - PHONES (Usually on the front of the AV Receiver)
- Take the 3.5mm Auxiliary Cable that we provided in the box, and plug one end of it into the PHONES Port on your AV Receiver. You'll need to use a 6.35mm to 3.5mm converter here (needs to be purchased separately.)
-

- Plug the other end of the cable into the AUX Port next to the Antenna (the one closer to the BLACK Optical Port) on the back of your transmitter.
-

- Make sure that the "AUX" indicator on the transmitter is now SOLID WHITE. If not, press the "AUX/OPT" button once.
-


For more questions, please send us an email at support@avantree.com, we'll have someone assist you as soon as possible.


