Connecting to a TV
Step 1: Connect the transmitter tower to a power source using the power cable we provided, and flip the power switch to "ON."


Step 2: Power up the headphones that came with the HT280 set by pressing & holding the power button on the headphones.
You'll see the RED LED light turn on. Give it a few seconds, it'll automatically connect with the transmitter tower. The same LED light will turn into SOLID YELLOW-GREEN once they've successfully connected.


Step 3: Connecting to TV.
The HT280 supports Digital Optical, Auxiliary (3.5mm,) RCA (RED/WHITE,) and Coaxial. Please check and see which one your TV supports; any ONE of the four will work.
- Option A - Digital Optical
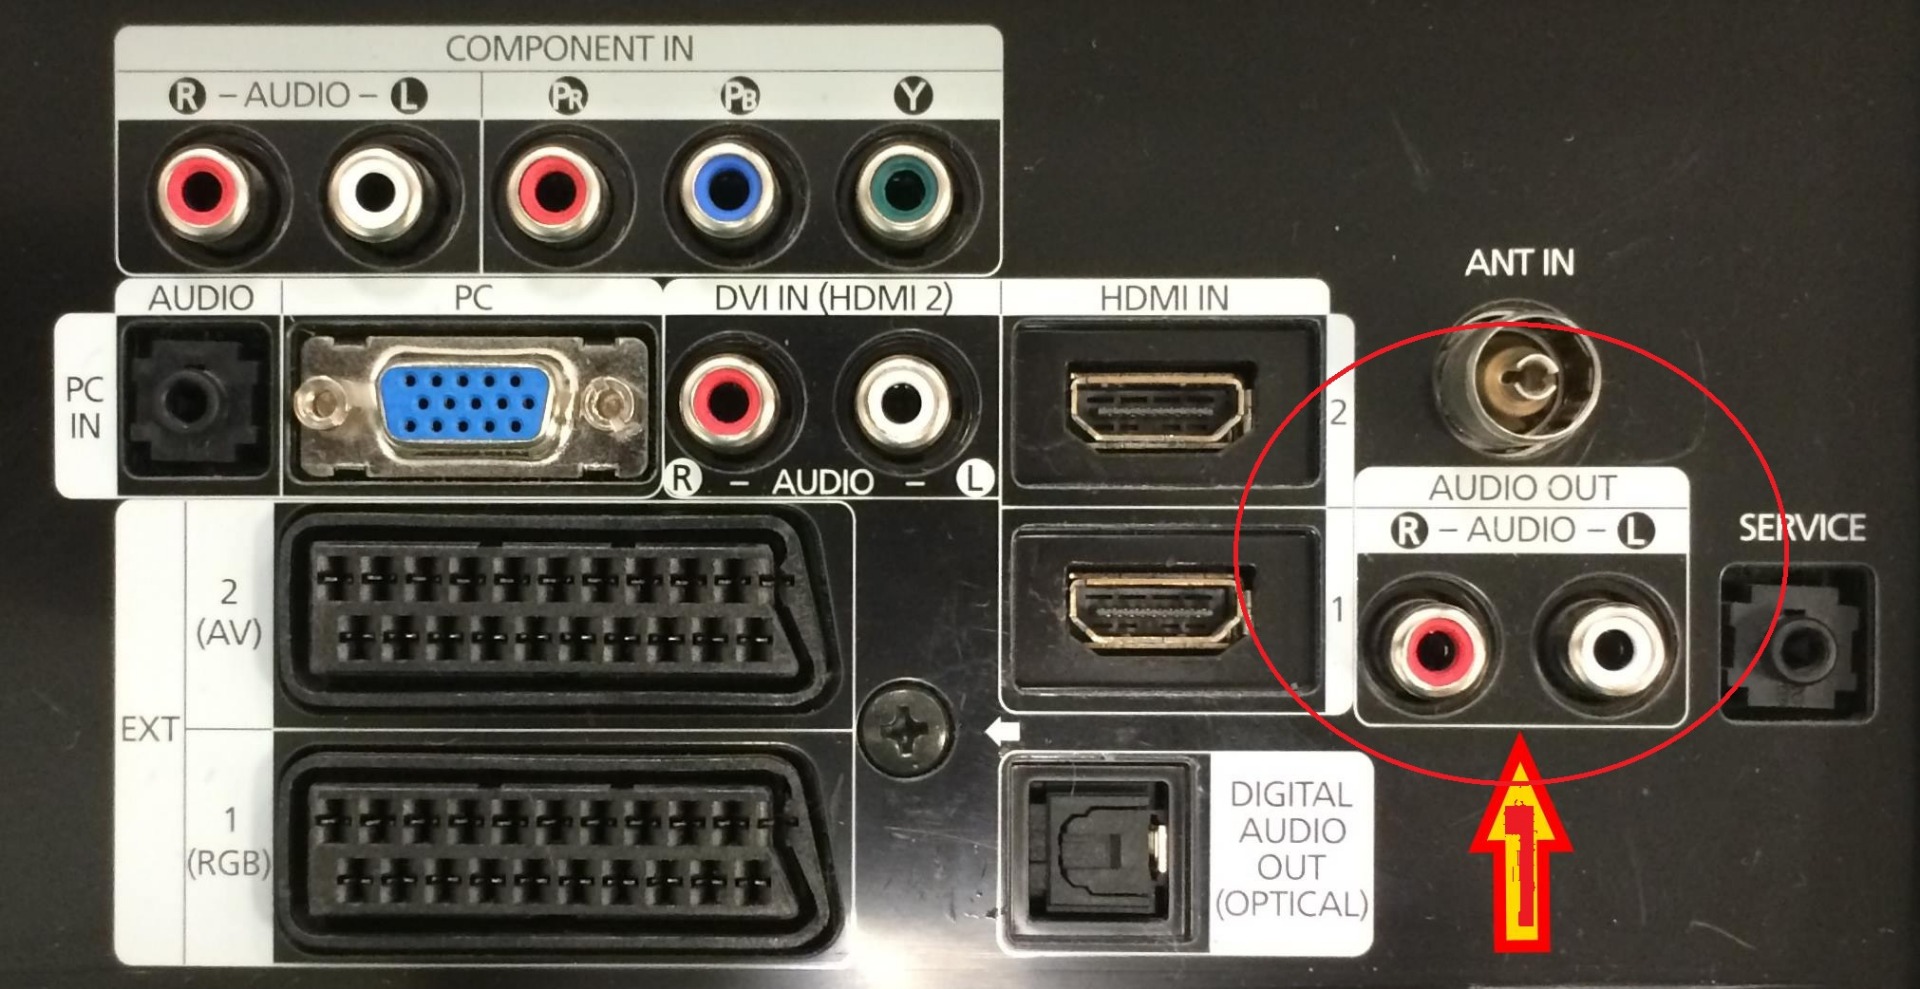
- Take the Optical Cable that we provided in the box, and plug one end of it into the "Digital Audio Out" or "Optical" port on the back of your TV.
-
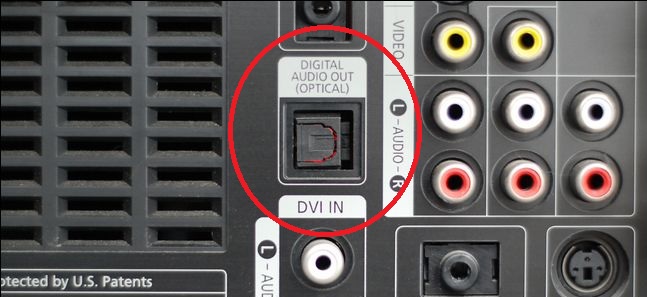
- Plug the other end of the cable into the Optical Port on the back of the transmitter tower.
-

- Slide the OPT / AUDIO switch on the transmitter tower to "OPT" position.
-

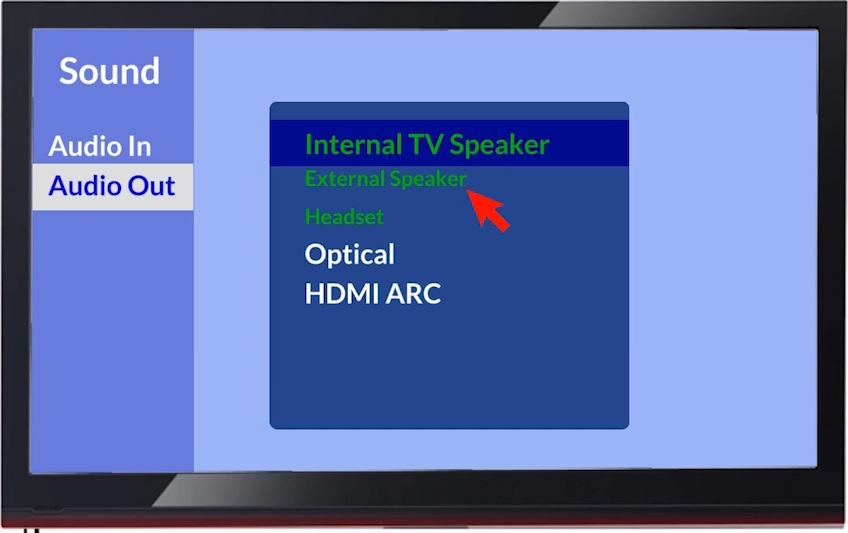
- Go to your TV's SOUND settings, make sure that the AUDIO OUTPUT has been set to "EXTERNAL SPEAKER." Some TVs automatically complete this step for you, some don't.
-
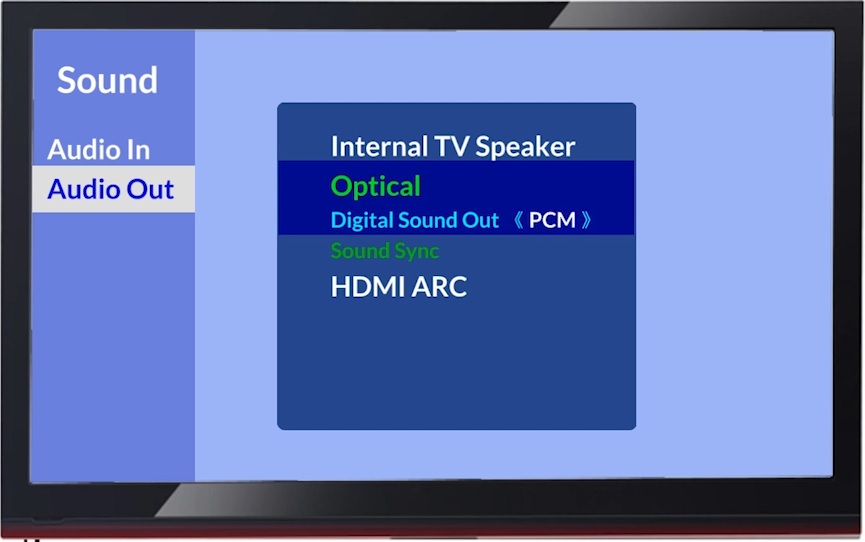
- Also in your TV's SOUND settings, make sure that the AUDIO FORMAT has been set to "PCM." Some TVs automatically complete this step for you, some don't.
-
- Option B - Auxiliary (3.5mm)
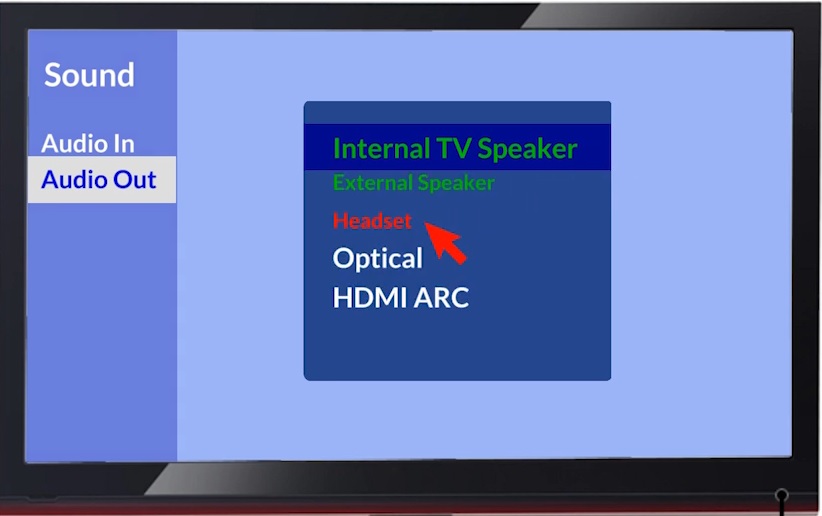
- Take the 3.5mm Auxiliary Cable that we provided in the box, and plug one end of it into the "HEADSET" or "3.5mm AUDIO OUT" port on the back of your TV.
-
- Plug the other end of the cable into the BLACK end of the RCA-AUX Converter Cable.
- Then plug the RED/WHITE end of the Converter Cable into the RED/WHITE ports on the back of the transmitter tower.
-

- Slide the OPT / AUDIO switch on the transmitter tower to "AUDIO" position.
-

- Go to your TV's SOUND settings, make sure that the AUDIO OUTPUT has been set to "HEADSET." Some TVs automatically complete this step for you, some don't.
-
- Option C - RCA (RED / WHITE)
- Please note that ONLY the ones that are labeled "AUDIO OUT" can be used; the other ones won't work.
- Plug one end of the RCA (RED/WHITE) audio cable into the RCA AUDIO OUT port on the back of your TV.
-
- Plug the other end of the RCA (Red/White) audio cable into the Red/White port on the back of your transmitter tower.
-
- Slide the OPT / AUDIO switch on the transmitter tower to "AUDIO" position.
-
- Go to your TV's SOUND settings, make sure that the AUDIO OUTPUT has been set to "EXTERNAL SPEAKER." Some TVs automatically complete this step for you, some don't.
-
- Option D - Coaxial
- Take a coaxial audio cable (purchased separately,) and plug one end into the coaxial port on the back of your TV.
-

- Plug the other end of the Coaxial audio cable into the Coaxial port on the back of your transmitter tower.
-

- Slide the OPT / AUDIO switch on the transmitter tower to "COAXIAL" position.
-

- Go to your TV's SOUND settings, make sure that the AUDIO OUTPUT has been set to "DIGITAL." Some TVs automatically complete this step for you, some don't.


Now you should be good to go! If not, please feel free to email us at support@avantree.com, we'll have someone assist you with your set up.


